In the modern kitchen, innovation and technology play crucial roles in elevating culinary creations from simple meals to works of art. One such technological marvel that has been gaining popularity among chefs and home cooks alike is the electric heat stamp. This versatile tool allows for precision, customization, and professional-grade finishes that can turn ordinary dishes into extraordinary masterpieces. In this guest post, we will explore the art of using electric heat stamps in the kitchen, delving into their benefits, applications, and techniques to help you harness their full potential.
What is an Electric Heat Stamp?
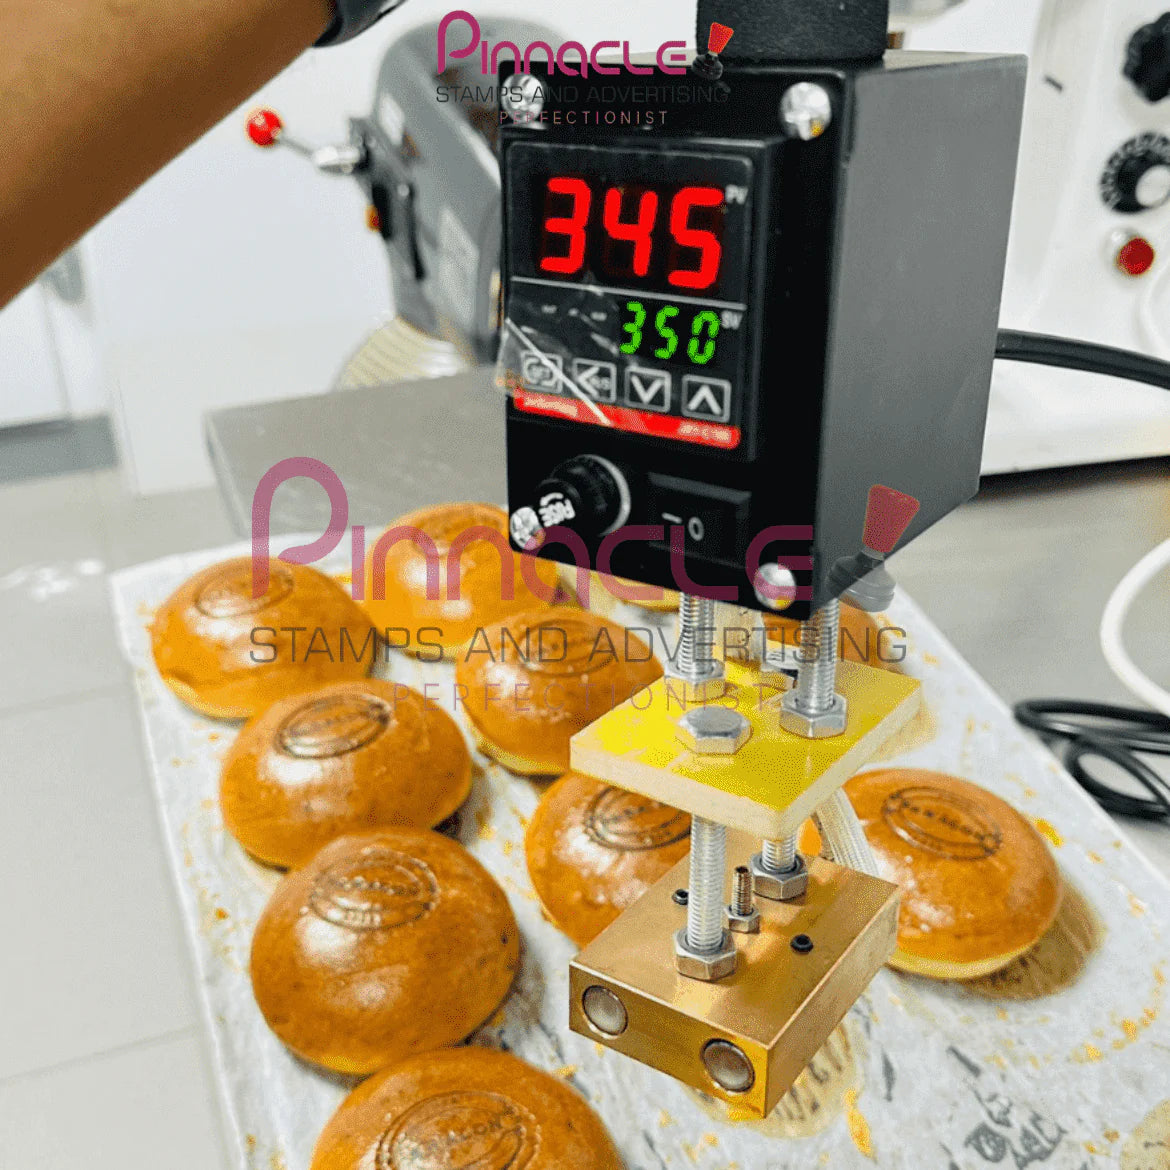
An electric heat stamp is a specialized tool designed to imprint designs, logos, or text onto various food surfaces using heat. Unlike traditional stamps, which rely on manual pressure, electric heat stamps use controlled heat to create clear, precise imprints. This makes them ideal for marking a wide range of culinary creations, from baked goods and chocolates to meats and vegetables.
Why Use an Electric Heat Stamp?
The appeal of electric heat stamps lies in their ability to provide a consistent, professional finish with minimal effort. Here are some key benefits:
-
Precision and Consistency: Electric heat stamps offer unparalleled precision, ensuring each imprint is identical. This is essential for maintaining quality and consistency, especially in commercial kitchens.
-
Speed and Efficiency: The use of heat eliminates the need for repetitive manual pressure, making the process faster and more efficient. This is particularly advantageous for large-scale production.
-
Customization: Electric heat stamps can be customized with different designs, logos, or messages, allowing chefs and bakers to personalize their creations for special occasions or branding purposes.
-
Versatility: These stamps can be used on a variety of food items, including bread, pastries, chocolates, meats, and even fruits and vegetables. This versatility makes them a valuable tool in any kitchen.
Applications of Electric Heat Stamps
The applications of electric heat stamps are vast and varied, offering endless possibilities for creativity and innovation in the kitchen. Here are some popular uses:
-
Baked Goods: Use electric heat stamps to imprint designs onto cookies, cakes, and bread. Whether it's a bakery logo, festive pattern, or personalized message, the imprints add a professional touch to your baked goods.
-
Chocolates: Create custom chocolate bars, truffles, and candies with unique imprints. Electric heat stamps can produce detailed designs that make your chocolates stand out.
-
Meats: Impress your guests with beautifully branded steaks, burgers, or poultry. Electric heat stamps can mark meats before or after cooking, adding a gourmet touch to your dishes.
-
Vegetables and Fruits: Add decorative imprints to fruits and vegetables for a unique presentation. This can be particularly effective for garnishes, salads, or fruit platters.
-
Pastries: Enhance the visual appeal of pastries such as tarts, pies, and croissants by adding intricate designs. This not only makes them look more appealing but also helps to differentiate between different flavors or fillings.
How to Use an Electric Heat Stamp: A Step-by-Step Guide
Using an electric heat stamp may seem intimidating at first, but with a little practice, you can achieve stunning results. Follow these steps to get started:
-
Choose the Right Stamp: Select an electric heat stamp with the design or message you want to imprint. Ensure it is clean and in good working condition.
-
Preheat the Stamp: Plug in the electric heat stamp and allow it to preheat according to the manufacturer's instructions. This usually takes a few minutes.
-
Prepare the Food Item: Make sure the surface of the food item you are stamping is clean and dry. For baked goods, allow them to cool slightly before stamping.
-
Test the Stamp: Before applying the stamp to your food item, test it on a piece of scrap material to ensure the temperature and imprint are correct.
-
Stamp the Food: Once the stamp is ready, press it firmly and evenly onto the food surface. Hold it in place for a few seconds to allow the heat to transfer and create a clear imprint.
-
Inspect the Imprint: Carefully lift the stamp and inspect the imprint. If necessary, adjust the temperature or pressure to achieve the desired result.
Creative Ideas for Electric Heat Stamping
Electric heat stamps offer a world of creative possibilities. Here are some ideas to inspire you:
-
Personalized Cookies: Create personalized cookies for special occasions such as weddings, birthdays, or holidays. Imprint names, dates, or custom designs to make your cookies truly unique.
-
Branded Chocolates: Impress clients and customers by branding your chocolates with a company logo or custom design. This is a great way to combine marketing with delicious treats.
-
Decorative Bread: Add intricate designs to bread loaves, rolls, or buns. This not only enhances their visual appeal but also helps to differentiate between different types of bread in a bakery.
-
Gourmet Meats: Brand your meats with a custom design or logo for a gourmet presentation. This can be especially effective for high-end restaurants or special events.
-
Artistic Pastries: Use electric heat stamps to create artistic designs on pastries. Combine different designs and techniques to produce stunning, edible works of art.
Tips for Using Electric Heat Stamps
To get the best results with your electric heat stamp, keep these tips in mind:
-
Practice Makes Perfect: It may take a few tries to get the hang of using an electric heat stamp. Practice on scrap materials before applying the stamp to your final product.
-
Adjust the Temperature: Different food items may require different temperatures for optimal results. Experiment with different settings to find the perfect temperature for each type of food.
-
Clean the Stamp Regularly: Regularly clean your electric heat stamp to prevent buildup of food particles and ensure consistent imprints. Follow the manufacturer's instructions for cleaning and maintenance.
-
Use Even Pressure: Apply even pressure when stamping to ensure a clear and consistent imprint. Avoid pressing too hard, as this can damage delicate food items.
-
Be Creative: Don’t be afraid to experiment with different designs and techniques. The versatility of electric heat stamps allows for endless creative possibilities.
Conclusion
Electric heat stamps are a powerful tool in the kitchen, offering precision, customization, and versatility that can elevate your culinary creations to new heights. Whether you're a professional chef looking to brand your dishes or a home cook aiming to impress your guests, electric heat stamps provide an easy and effective way to add a professional finish to your food. By mastering the art of using electric heat stamps, you can transform ordinary meals into extraordinary works of art, delighting your customers and loved ones with beautifully stamped, delicious treats.
So, the next time you're in the kitchen, plug in your electric heat stamp and let your creativity run wild. Happy stamping!


