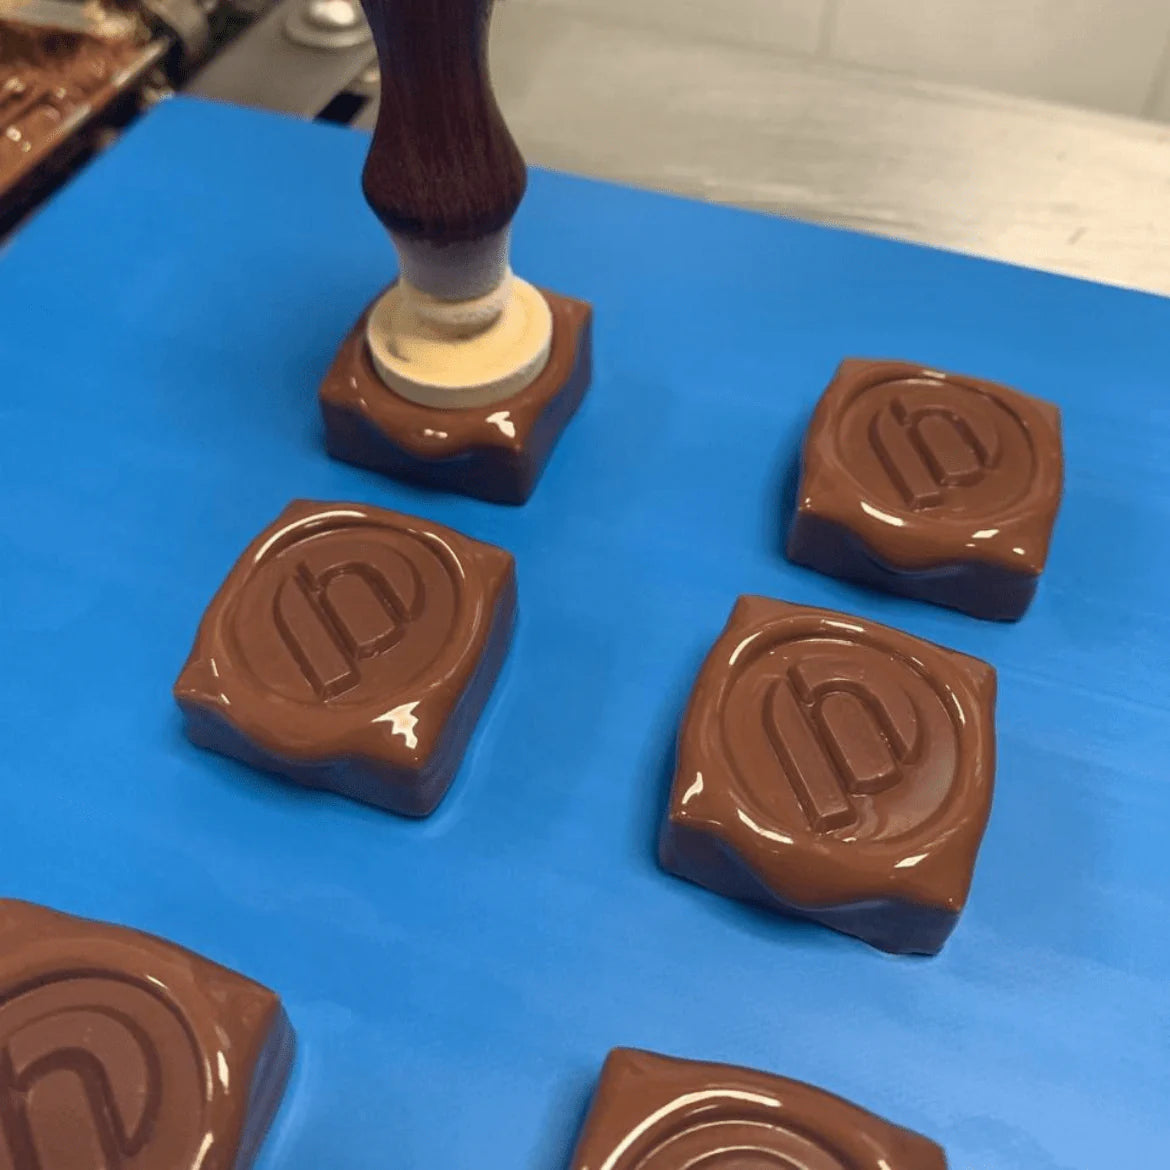
The Art of Chocolate Stamp Making: Elevating Your Bakery Creations
- Posted by M. Azhar Ameen
- 0 comments

In the ever-evolving world of baking and confectionery, creativity knows no bounds. One trend that has gained traction in recent years is the use of chocolate stamps to add a touch of elegance and personalization to your desserts. Whether you’re a professional baker or a home enthusiast, chocolate stamping can elevate your creations and provide an opportunity for artistic expression. In this post, we’ll delve into the process of making chocolate stamps, the benefits they bring to your bakery, and some inspiring ideas to get you started.
What Are Chocolate Stamps?
Chocolate stamps are tools used to imprint designs onto chocolate or other confections. These stamps can range from simple shapes to intricate patterns, logos, or even personalized messages. By using a chocolate stamp, bakers can create visually stunning treats that appeal to both the eyes and the palate.
Benefits of Using Chocolate Stamps in Your Bakery
1. Enhanced Visual Appeal
Chocolate stamps can transform an ordinary dessert into a work of art. The imprint adds depth and character, making your treats visually striking and more enticing to customers. Whether it's for cakes, cookies, or chocolates, a beautifully stamped design can elevate your product presentation significantly.
2. Branding Opportunities
For bakeries looking to establish a strong brand identity, custom chocolate stamps featuring your logo or unique design can reinforce brand recognition. This not only differentiates your products but also communicates quality and craftsmanship, encouraging customer loyalty.
3. Personalization
Chocolate stamps provide an excellent way to personalize treats for special occasions. Whether it’s a wedding, birthday, or corporate event, custom imprints can make your offerings unique and memorable, allowing customers to celebrate in style.
4. Creative Expression
Using chocolate stamps allows for creative expression in your baking. You can experiment with different designs, colors, and techniques to create a variety of products that reflect your style and culinary philosophy.
Making Your Own Chocolate Stamps
1. Materials Needed
- Food-safe stamp material: Silicone or acrylic is ideal for creating stamps that can handle the heat of chocolate.
- Chocolate: Choose high-quality chocolate (dark, milk, or white) for best results.
- Craft knife or mold-making tools: For creating detailed designs.
- Food-safe colors (optional): If you wish to add color to your stamps.
- Parchment paper: For easy handling of stamped chocolates.
2. Designing Your Stamp
Start by sketching the design you want to create. Keep in mind that simpler designs often translate better into stamps. Once you have a design, you can create a digital version using design software or sketch it by hand. If you're making a custom stamp, consider using a service that specializes in custom stamp creation.
3. Creating the Stamp
-
Using Silicone Molds: If you're using silicone, pour your chocolate into a mold that matches your design. Let it cool and harden. Once solid, you’ll have a stamp ready to use.
-
Using Acrylic or 3D-Printed Stamps: If you're using an acrylic stamp, ensure it has a raised design that will create an impression. You can either carve it yourself or have it made professionally.
4. Preparing the Chocolate
Melt your chocolate using a double boiler or microwave. If you want to color your chocolate, add food-safe colors at this stage. Make sure the chocolate is smooth and free of lumps for the best stamping results.
5. Stamping the Chocolate
Once the chocolate is melted and cooled slightly (but still pourable), pour it onto a sheet of parchment paper to create a flat layer. While the chocolate is still soft, press your stamp firmly into the chocolate, ensuring even contact. The imprint should be clear and defined.
6. Letting It Set
Allow the stamped chocolate to cool and harden completely. You can refrigerate it for quicker results, but be cautious of condensation. Once set, carefully remove the stamped chocolate from the parchment paper.
Creative Ideas for Using Chocolate Stamps
1. Personalized Gifts
Create custom chocolates stamped with names or messages for special occasions like weddings, anniversaries, or birthdays. These personalized touches can make any gift feel special and unique.
2. Seasonal Treats
Utilize seasonal designs for holidays and events. For instance, create Christmas-themed stamps with snowflakes or Easter stamps with bunnies and eggs. These seasonal offerings can attract customers looking for festive treats.
3. Signature Products
Develop signature chocolate products that incorporate your unique stamp design. This could be a chocolate bar, truffles, or dipped cookies, each bearing your distinctive branding or artistic touch.
4. Interactive Workshops
Host chocolate stamping workshops where participants can create their own stamped chocolates. This not only builds community but also encourages customers to engage with your bakery in a fun, creative way.
5. Collaborations
Consider collaborating with local artists or designers to create limited-edition chocolate stamps that reflect their unique styles. This not only diversifies your offerings but also supports local talent.
Conclusion
Chocolate stamping is a delightful way to add flair and personalization to your bakery creations. By embracing this art form, you can enhance the visual appeal of your products, reinforce your brand identity, and provide memorable experiences for your customers. As you embark on your chocolate stamping journey, remember that creativity and experimentation are key. So, grab your materials, unleash your artistic side, and watch as your bakery transforms with the magic of chocolate stamps!


